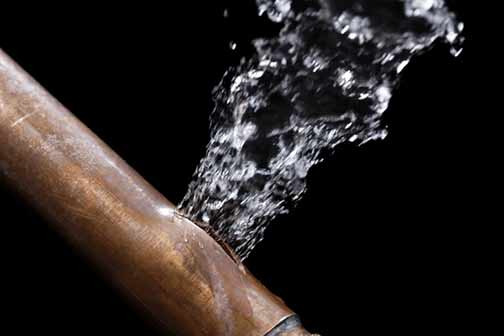
Burst pipes can occur for a variety of reasons, and understanding these causes is crucial for both preventing and addressing the issue. One of the most common causes is freezing temperatures. When water inside the pipes freezes, it expands, putting immense pressure on the pipe walls, which can eventually lead to a burst. Another common cause is corrosion, especially in older pipes.
Over time, the metal can weaken and develop small holes or cracks, which can become larger and cause a burst. High water pressure is another culprit, as it can stress pipes beyond their capacity, leading to failure. Additionally, physical damage from construction or landscaping activities can also result in burst pipes.
Signs and Symptoms of a Burst Pipe: Water Pressure Drops, Water Stains, Damp Spots, and Water Pooling
Detecting a burst pipe early can minimize the damage and repair costs. Some of the most obvious signs include a sudden drop in water pressure, water stains on walls or ceilings, and the sound of running water when no taps are open.
You might also notice wet or damp spots on floors, walls, or ceilings, which can indicate a leak. In some cases, there may be visible signs of water pooling around the foundation of your home. If you detect any of these symptoms, it’s important to act quickly to prevent further damage.
Immediate Steps to Take When a Pipe Bursts: Shutting Off Water Supply, Draining Faucets, and Ensuring Safety
If you suspect that a pipe has burst, it’s important to take immediate action to minimize water damage and prevent further issues. The first step is to turn off the main water supply to stop the flow of water. Next, open all faucets to drain the remaining water from the pipes. This will help reduce pressure and prevent additional leaks.
If the burst pipe is in an accessible location, place a bucket or container under the leak to catch any dripping water. It’s also a good idea to turn off the electricity if the burst pipe is near any electrical outlets or appliances to prevent electrical hazards.
Tools and Materials Needed for Burst Pipe Repair: Essential Tools and Supplies
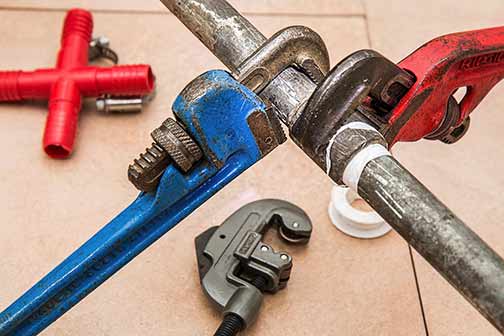
Having the right tools and materials on hand can make the repair process much smoother. Some essential tools include a pipe cutter or hacksaw, adjustable wrench, pipe wrench, and pliers. You’ll also need materials such as pipe repair clamps, epoxy putty, pipe fittings, and replacement pipe sections.
For temporary fixes, having plumber’s tape and a pipe repair kit can be very useful. Additionally, having a bucket, towels, and a wet/dry vacuum can help manage any water cleanup during the repair process.
Diagnosing the Extent of the Damage: Visual Inspection, Hidden Leaks, and Moisture Detection
Before you can begin repairing a burst pipe, it’s important to accurately diagnose the extent of the damage. Start by visually inspecting the affected area for any obvious signs of damage, such as cracks, holes, or bulging. Use a flashlight to check for any hidden leaks or damage in hard-to-reach areas. If you’re unsure about the extent of the damage, consider using a moisture meter to detect any hidden moisture in walls or floors.
In some cases, it may be necessary to cut away sections of drywall or flooring to fully assess the damage. Once you have a clear understanding of the damage, you can determine the best course of action for repair.

Temporary Fixes for Burst Pipes: Clamps, Epoxy Putty, and Plumber’s Tape
In some cases, a temporary fix may be necessary to stop the leak until a permanent repair can be made. One common temporary fix is to use a pipe repair clamp, which can be placed over the damaged area to stop the leak. Another option is to use epoxy putty, which can be molded around the damaged area to create a watertight seal.
Plumber’s tape can also be used to wrap around small leaks to temporarily stop the flow of water. While these temporary fixes can be effective in the short term, it’s important to address the underlying issue with a permanent repair as soon as possible.
Permanent Solutions for Burst Pipe Repair: Replacing Damaged Sections
For a permanent solution, the damaged section of the pipe will need to be replaced. Start by turning off the water supply and draining the pipes. Use a pipe cutter or hacksaw to remove the damaged section of the pipe. Measure and cut a replacement section of pipe to fit the gap, making sure to account for any fittings or connectors.
Use pipe fittings and connectors to attach the new section of pipe, ensuring a secure and watertight seal. Once the new section is in place, turn the water supply back on and check for any leaks. If everything is secure, you can restore any drywall or flooring that was removed during the repair process.
Preventative Measures to Avoid Future Bursts: Insulation, Regular Inspections, and Pressure Regulation
Preventing burst pipes in the future involves taking proactive measures to protect your plumbing system. Insulating pipes, especially those in unheated areas like basements or attics, can help prevent them from freezing in cold weather. Regularly inspecting your pipes for signs of corrosion or damage can help catch potential issues before they become major problems.
Installing a pressure regulator can help maintain safe water pressure levels and prevent stress on your pipes. Additionally, keeping your home at a consistent temperature, even when you’re away, can help prevent pipes from freezing and bursting.
When to Call a Professional Plumber: Complex Repairs and Safety Concerns
While some burst pipe repairs can be handled by homeowners, there are situations where it’s best to call a local plumber. If the burst pipe is in a hard-to-reach location or if you’re unsure about the extent of the damage, a professional plumber can provide a thorough assessment and repair.
Additionally, if the burst pipe has caused significant water damage or if you encounter any electrical hazards, it’s important to seek professional help. A licensed plumber has the expertise and tools to handle complex repairs and ensure that your plumbing system is restored to proper working order.

