If you’re experiencing issues with your water heater, such as no hot water or intermittent heat, it’s possible that the pilot light has gone out. Fortunately, relighting the pilot light is often a simple task that can be done without the need for a professional plumber. Below we will provide you with step-by-step instructions on how to locate and relight your water heater pilot light, ensuring you have a steady supply of hot water once again.
Understanding the Water Heater Pilot Light
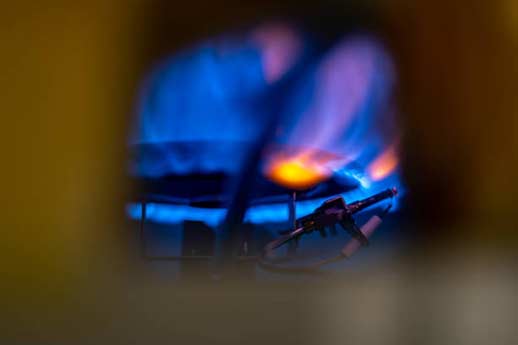
Before we get into the process of finding and relighting your water heater pilot light, let’s take a moment to understand what it is and how it works. The pilot light is a small flame that burns continuously, serving as an ignition source for the main burner in your water heater. When the pilot light goes out, it prevents the main burner from igniting, resulting in a lack of hot water.
The pilot light is typically located at the bottom of the water heater, inside a small compartment. It is fueled by either natural gas or propane, depending on the type of water heater you have. A small knob, usually labeled “Pilot,” allows you to control the flow of gas to the pilot light.
Gathering the Necessary Tools
Before attempting to relight your water heater pilot light, it’s essential to gather the necessary tools. Here’s a list of items you’ll need:
- A flashlight: This will help you see inside the water heater compartment.
- A long match or fireplace lighter: You’ll need a long ignition source to relight the pilot light without putting your hand too close to the flame.
- Protective gloves: It’s always a good idea to wear gloves when working with any heating appliance.
Locating the Water Heater
The first step in relighting your water heater pilot light is to locate the water heater itself. In most homes, the water heater is situated in the basement, garage, or utility closet. Look for a large tank with pipes connected to it. Once you’ve found the water heater, make sure to turn off the gas supply using the shut-off valve, which is typically positioned on a nearby wall or on the water heater itself. Turning off the gas supply is an essential safety precaution that should always be followed before working on your water heater.
Preparing the Water Heater
With the gas supply turned off, it’s time to prepare the water heater for the pilot light relighting process. Start by removing the access panel, which covers the pilot light compartment. The access panel is usually held in place with screws or clips and can be easily taken off with a screwdriver or pliers. Once the access panel is removed, you’ll have clear visibility of the pilot light and the control knob.
Relighting the Water Heater Pilot Light
Now that you’ve reached the pilot light compartment, follow these step-by-step instructions to relight your water heater pilot light:
Step 1: Wait for Gas Fumes to Dissipate
After removing the access panel, it’s important to give the gas fumes inside the compartment enough time to dissipate. Wait at least five minutes to ensure that any residual gas has cleared away. This step is crucial for safety, as attempting to ignite the pilot light in the presence of gas fumes can be dangerous.
Step 2: Locate the Pilot Light and Control Knob
Using your flashlight, locate the pilot light and the control knob. The control knob is typically labeled “Pilot” and is located near the bottom of the water heater. Take a moment to familiarize yourself with the different settings on the control knob.
Step 3: Switch the Control Knob to “Pilot”
Turn the control knob to the “Pilot” setting. This will ensure that gas flows to the pilot light when the knob is depressed. It’s essential to hold the control knob in the “Pilot” position throughout the entire relighting process.
Step 4: Depress and Hold the Control Knob
With the control knob in the “Pilot” position, use your long match or fireplace lighter to ignite the pilot light. Place the flame near the pilot light and depress the control knob. This will allow the gas to flow to the pilot light while simultaneously igniting it. Continue to hold the control knob in the depressed position for about one minute after the pilot light has been successfully ignited.
Step 5: Switch the Control Knob to “On”
After holding the control knob in the depressed position for one minute, switch it to the “On” position. This will enable the gas to flow to the main burner, igniting it and providing the necessary heat for your water heater to function.
Step 6: Replace the Access Panel
Once the pilot light is successfully relit and the control knob is switched to the “On” position, carefully replace the access panel. Make sure it is securely fastened to prevent any unauthorized access to the pilot light compartment.
Testing and Troubleshooting
Now that you’ve relit your water heater pilot light, it’s time to test the hot water supply. Turn on a hot water faucet in your home and wait for the water to heat up. If the water remains cold or the pilot light goes out again, there may be an underlying issue with your water heater that requires professional attention. In such cases, it’s best to contact a plumber who can diagnose and resolve the problem.
Closing Thoughts
Relighting your water heater pilot light is a relatively straightforward process that can restore the functionality of your water heater. By following the step-by-step instructions outlined in this article, you’ll be able to find and relight your pilot light safely and efficiently. Remember to prioritize safety throughout the entire process and don’t hesitate to contact a professional plumber if you encounter any difficulties. With a properly functioning pilot light, you’ll enjoy a constant supply of hot water for all your daily needs.

