
Heavy rainfall is a common occurrence in the United States, and with it comes the risk of basement flooding. To safeguard your property from water damage, installing a backup sump pump is a wise investment. A backup sump pump provides an additional layer of protection in case the primary sump pump fails. Here we will guide you through the process of installing a backup sump pump, ensuring your basement remains dry even during the heaviest of storms.
Step 1: Assess Your Basement’s Needs
The first step in installing a backup sump pump is to assess the specific needs of your basement. Take into consideration factors such as the size of your basement, the average water level during heavy rainfalls, and any existing sump pump system you may have in place. This assessment will help determine the type and capacity of the backup sump pump required for your particular situation.
Step 2: Choose the Right Backup Sump Pump
With various options available in the market, it is crucial to choose the right backup sump pump for your needs. Look for a pump that offers reliable battery backup, ensuring it can operate during power outages. Consider factors such as pump capacity, durability, and ease of maintenance. Additionally, check if the backup pump has an alarm system to alert you in case of any issues.
Step 3: Gather the Necessary Tools and Equipment
Before you begin the installation process, make sure you have all the necessary tools and equipment on hand. This may include a wrench, screwdriver, PVC pipe, check valve, battery, battery case, and any other components specific to the backup sump pump system you have chosen. Having all the tools readily available will help streamline the installation process.
Step 4: Prepare the Sump Pit
To prepare the sump pit, ensure it is clean and free of debris. Remove any residual water if present. Inspect the sump pit and ensure it is in good condition, without any cracks or leaks. If needed, clean or repair the pit before proceeding with the installation.
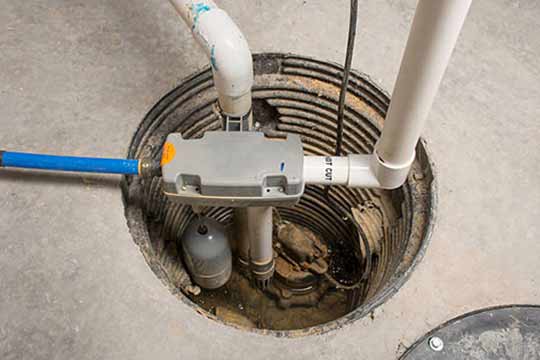
Step 5: Install the Backup Sump Pump
Begin by attaching the backup sump pump to the discharge pipe using the proper fittings. Make sure the pump is securely attached to prevent any leaks. Position the backup pump at an appropriate height, ensuring it is above the primary sump pump. Connect the check valve to prevent any backflow and secure it tightly. If necessary, install additional PVC pipe and fittings to connect the backup pump to the existing discharge pipe system.
Step 6: Connect the Battery Backup System
If your backup sump pump operates on a battery backup system, connect the battery and battery case according to the manufacturer’s instructions. Ensure all connections are secure and that the battery is properly charged. Test the battery backup system to confirm it is functioning correctly and able to activate the backup pump when needed.
Step 7: Test and Maintain the Backup System
Once the backup sump pump installation is complete, perform a thorough test to ensure both the primary and backup pumps are functioning as intended. Pour water into the sump pit to trigger the pump activation and verify that the backup pump engages when necessary. Regularly inspect and maintain the backup sump pump system, including checking the battery charge, cleaning any debris, and testing the pump’s functionality.
Conclusion
Installing a backup sump pump in your basement is a proactive step to prevent flooding caused by heavy rainfalls and potential sump pump failures. By following the step-by-step process outlined in this article, you can ensure a reliable backup system is in place to protect your property. Remember to choose the right backup sump pump, gather the necessary tools, and perform regular maintenance to keep your basement dry during the worst storms. Don’t wait for an emergency; take action now to safeguard your basement.