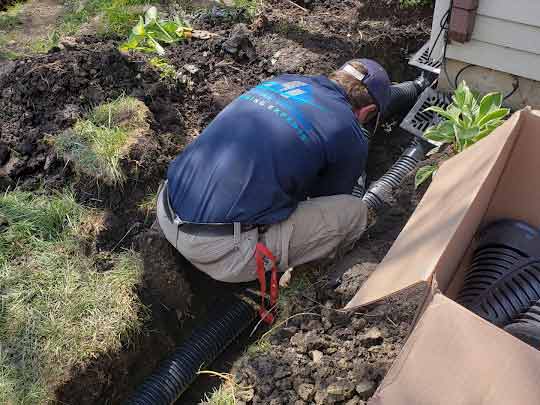
A French drain is a ditch dug into the yard to manage ground-level water. French drains are usually designed to look like part of the home’s landscaping, explains State Management, and consist of a perforated pipe laid inside a gravel-filled pit, with both pipe and gravel wrapped in landscaping fabric.
The pipe is set at an angle to help water flow downwards under the force of gravity. The gravel allows water to percolate into the holes on the sides of the pipe. French drains channel storm water away from the base of a building or places in the yard where water collects.
They are a simple solution for homes where water pools around the foundation of the building and slowly find its way into the basement. With a French drain, it is easy to reroute unwanted water in the yard, and this can all be done without altering the appearance of your landscaping.
How do you install a French drain?
French drains are an ideal solution for swampy yards. For them to work, there has to be an adequate slope to enable the water to move naturally to another location on the property. Installing a French drain is not hard at all. Here is how you can do it:
Tools and materials
- Shovel
- Power drill
- Corrugated drainpipe or PVC pipe
- Landscaping fabric
- Gravel
- Stakes or flags
- Pipe fittings
- Inlet grill
- Sod cutter
- Topsoil
Step one: Plan your location
Where is water collecting in your yard and why? You need to be sure that your water problem is not due to a water line that needs repair on the property for starters. French drains are only helpful in removing runoff from rain or melted snow. After identifying the location you want to channel water away from, you need to decide where you want that water to go. The easiest way is to direct the water into an existing drainage, a body of water, or the street.
Step two: Map out the channel
The next step after you decide where you want to channel the water is to map the route of your drain. The direction of the trench and its length will determine the number of materials you need. Ensure your trench starts from a higher to a lower elevation and is directed away from your home. If water cannot flow through the pipe naturally, you will compound your drainage issues. Use stakes, flags, or spray paint to mark the route of the trench.
Step three: Digging the trench
Before you start digging, ensure there are no underground utility lines or water pipes in the area. The depth of the trench should be 18”, its width 9-12”, and it should slope at the rate of one inch per 10” of piping (1% slope).
If lawn grass is in the area where you plan to dig your trench, you may want to reuse the sod after completing the French drain. To do this, use a sod cutter – set to the most profound setting – and cut out 18-inch sections of sod along the route. Lift the sod out with a shovel and lay them beside the trench to be reused afterward.
Step four: Line the trench and fill it with gravel
Line the finished trench with landscape fabric to help keep tree roots, silt, and debris out of the trench. Without landscape fabric, the soil will easily get into the pipe and clog it. You also want at least 10” of excess material on both sides of the trench to cover the pipe later. Pour three inches of gravel into the trench as bedding for the pipe and compact it. Before you do this, ensure the landscaping fabric is flush against the trench’s sides and bottom.
Step four: Install the pipes and inlet grate
The inlet grate should be installed where water pools the most in your yard; it should be flush with the ground. Attach a pipe to the inlet grate and extend the piping using pipe fittings. For curved drains, use flexible or corrugated pipes (purpose-built French drainpipes are the best option; they are strong and already have holes in them).
If your drain is straight, you may use corrugated pipe or PVC. If your pipes are not purpose-built for French drains, you will have to drill holes in them. The holes should be six inches apart along the length of the pipe. Pour water into the inlet grate to test the drain.
Step five: Finish the drain
Close the inlet grate and cover the entire pipe with gravel and should be below ground level. Cover the pipe and gravel with the excess landscaping fabric. Before you fill the trench with topsoil, place a temporary cover over the inlet grate to keep the soil from getting into it. Tamp down the topsoil to compact it and replace the sod you removed from the area. This is how you install a French drain in your yard.
Follow these five steps to install French drains to help with your water management in your home.

