
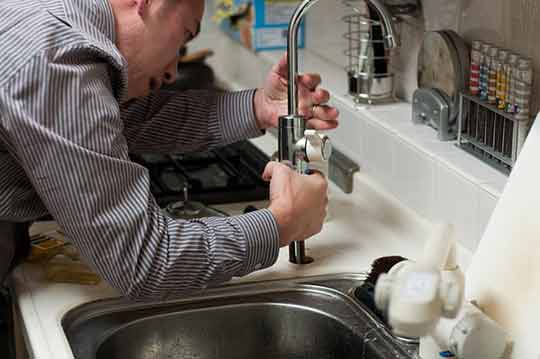
How to install kitchen sink plumbing you ask? The drain assembly of a kitchen sink is the set of pipes that sit under your kitchen sink. These pipes carry wastewater from the kitchen sink to the underground drain pipes outside your home. It is rare for this component of your home’s plumbing to fail and need repair.
You may want to replace the plumbing underneath the kitchen sink when renovating your home, says Realty Management Associates, or updating your kitchen sink. The steps for replacing the sink plumbing will depend on how different the new sink is from the old one.
You can use the old plumbing if the two sinks are the same. The installation process also depends on the following;
- If you are replacing a single-basin sink with a double-basin sink.
- If the new sink has a deeper basin than the old one.
- Whether you are installing garbage disposal too.
Steps for installing kitchen sink plumbing
Preambles
Before you begin, you need to know the following:
- Kitchen drain traps come in bundled kits for single-basin sinks, double-basin sinks, and sinks with the garbage disposal. Determine the right one for your installation.
- Most kitchen drains use 1 ½ inch pipes instead of the standard 1 ¼ found in bathrooms. If the drain outlet for the sink is 2 inches, you can install adapter fittings between the drain pipe and drain outlet to make them match.
- Even if your drain pipe kit contains flexible corrugated tubing (which is easier to install), it is better to use smooth pipes. Smooth pipes are less likely to catch food waste.
- If the new sink has a deeper basin than the old one, you might need to lower the drain outlet in the wall. Leave this job for a professional plumber.
Needed tools and materials
- Kitchen drain trap kit.
- Sink drain and strainer assembly (for each basin).
- Tape measure.
- Marker.
- PVC tubing cutter or hacksaw.
- Channel-type pliers.
Step one: Check the height of the drain outlet
Check the height of the trap arm for the old sink before you remove it. If you don’t know what the trap arm is, it is that horizontal piece of piping between the P-trap and the drainpipe that enters the wall. The measurement should be from the floor beneath your sink or the cabinet’s base to the center of the trap arm.
Step two: Lower the drain outlet (if needed)
You only need to do this if your new sink has a deeper basin than the old one and the drain outlet is not low enough to accommodate the new sink. Changing the position of your drain outlet is a complex job that requires you to cut sections of the cabinet and wall. As earlier stated, this job is better done by a kitchen plumber.
Step three: Install garbage disposal and strainer
Since it takes up a lot of space, it is better to install the garbage disposal first. Choose the side of the sink where you want the garbage disposal (if installing a double-basin sink) and install the sink strainer on the other sink basin. If you plan to install a water filter or hot water dispenser, it is a good idea to install these under-sink components at this time too.
Step four: Install drain tailpiece and continuous waste pipe
The drain tailpiece connects the sink strainer to the tee fitting. The continuous waste pipe should run from the drain outlet of the garbage disposal to the side outlet of the tee fitting. The bottom outlet of the tee fitting should connect to the drain trap. When installing the continuous waste pipe, ensure it slopes down towards the tailpiece. Join these pieces with hand-tight connections until you have them in the right place; you can tighten them.
Step five: Install the drain trap
If you do the above connections right, the bend of the drain trap should fit onto the bottom of the tailpiece tee fitting, and you should be able to connect its arm to the drain outlet in the wall. Assemble the components of the drain trap loosely and push the trap bend into the tee fitting. Slide the arm of the drain trap into the drain outlet in the wall, and ensure the trap arm slopes downward toward the drain outlet. Adjust the pieces till they are in the desired positions; afterward, tighten them.
Step six: Check for leaks
If you did a good job, the water should flow when you open the sink faucets. Also, there should be no leaks from the joints underneath the sink. To check for leaks, fill the sink and unplug it while keeping an eye on the connections below. You may not get it right the first time unless you are a professional plumber. If there are leaks in any joints, tighten them. If the leak doesn’t stop, you may need to adjust the pipes.