Water heaters are a crucial part of any household, providing hot water for various purposes such as bathing, washing dishes, and doing laundry. With regular maintenance, you can extend the lifespan of your water heater and ensure its optimal performance. In this article, we will share our top water heater maintenance tips to help you keep your appliance in excellent condition. Whether you are a homeowner or a tenant, these tips will prove valuable for maintaining the efficiency and longevity of your water heater.
Understanding How Water Heaters Work
Before we dive into the maintenance tips, it is essential to understand how water heaters work. Typically, water heaters are storage tanks filled with water that is heated to the desired temperature. This heated water is then distributed through pipes to various fixtures in your home. The type of water heater you have installed will determine the heating mechanism, such as gas, electric, or solar power.
Now, let’s move on to the maintenance tips that will help you keep your water heater running smoothly and efficiently.
1. Regularly Check the Pressure Relief Valve
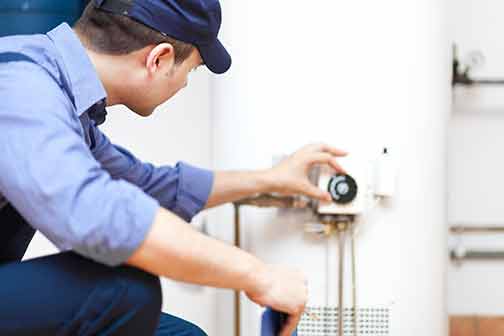
The pressure relief valve is a safety feature present in all water heaters. It is designed to release excess pressure if it builds up inside the tank. This valve should be checked at least once a year to ensure it is functioning correctly. To test the pressure relief valve, follow these steps:
1. Turn off the power supply to the water heater.
2. Locate the pressure relief valve, usually located on the side or the top of the tank.
3. Place a bucket beneath the valve to catch any water that may be released during the test.
4. Lift the valve’s lever to release the pressure. You should hear a hissing sound and see some water flowing into the bucket.
5. If no water comes out or the valve continues to leak, it may be faulty and requires replacement.
2. Drain and Flush the Tank Annually
Sediment buildup is a common problem in water heaters that can affect their efficiency and lead to potential damage. Draining and flushing the tank annually can help remove any sediment that has settled at the bottom, ensuring it does not interfere with the heating process. Here’s how to do it:
1. Turn off the power to the water heater.
2. Attach a hose to the drain valve located near the bottom of the tank. Direct the other end of the hose to a floor drain or a large bucket positioned lower than the water heater.
3. Open the drain valve and allow the water to flow out until it appears clear and free from sediment.
4. After draining the tank, close the drain valve and fill the tank back up with water.
3. Insulate Exposed Pipes
Insulating the exposed pipes connected to your water heater can help conserve energy and prevent heat loss. This is particularly important if your water heater is located in an unheated area such as a basement or garage. By insulating the pipes, you reduce the risk of freezing during cold weather, which can cause pipe bursts and potential water damage. Use foam pipe insulation sleeves or duct insulation tape to insulate the pipes.
4. Test the Anode Rod
The anode rod is a sacrificial component that attracts corrosive elements present in water, protecting the water heater tank from rust and deterioration. Over time, the anode rod can become depleted and will need to be replaced. We recommend checking the anode rod every 2-3 years or as advised by the manufacturer. Here’s how:
1. Turn off the power supply to the water heater.
2. Locate the anode rod, typically found at the top of the tank.
3. Unscrew the hex head attached to the rod using a socket wrench.
4. Inspect the rod for signs of excessive corrosion or depletion. If it appears heavily eroded or less than 6 inches in length, it is time to replace it with a new anode rod.
5. Inspect and Clean the Burner Assembly
If you have a gas-powered water heater, the burner assembly is a critical component responsible for heating the water. Over time, dust and debris can accumulate on the burner assembly, affecting its efficiency. Regularly inspect and clean the burner assembly to prevent blockages and ensure proper functioning. Follow the manufacturer’s instructions on how to access the burner assembly and use a soft brush or compressed air to remove any dirt or debris.

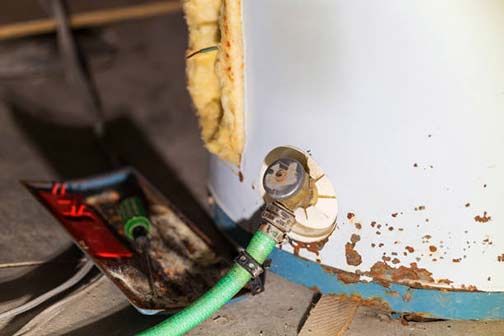
6. Check for Leaks
Periodically inspect your water heater for any signs of leaks. Even minor leaks can cause significant damage if left unaddressed. Check for water pooling around the base of the tank or dampness in the surrounding area. If you notice any leaks, it is crucial to contact a professional plumber near you to identify and repair the issue promptly.
7. Keep the Area Around the Water Heater Clear
Ensure that the space around your water heater is clear of clutter and debris. The area should be well-ventilated to prevent heat buildup, and there should be at least two feet of clearance around the heater. This allows for proper airflow and makes it easier to access the unit for maintenance or repairs.
Conclusion
By following these water heater maintenance tips, you can prolong the lifespan of your appliance, reduce energy consumption, and avoid costly repairs. Remember to always refer to the manufacturer’s instructions for specific maintenance requirements and consult a professional if you are unsure about any aspects of water heater maintenance. Regular maintenance will not only ensure a steady supply of hot water but also give you peace of mind knowing that your water heater is operating safely and efficiently.