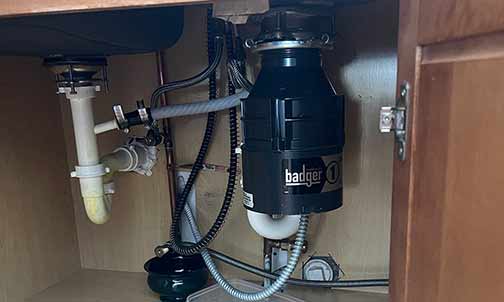
Whether you are a seasoned DIY enthusiast or a homeowner looking to save some money, this guide will provide you with easy-to-follow instructions to successfully install a garbage disposal in your home. With a little patience and the right tools, you can enjoy the convenience and benefits of having a garbage disposal system in your kitchen.
Benefits of a Garbage Disposal
A garbage disposal is a fantastic addition to any kitchen. It offers several benefits, including:
- Reduces kitchen odors by grinding and disposing of food waste effectively
- Prevents clogs in your kitchen pipes by grinding food into small particles
- Improves kitchen cleanliness by reducing the amount of food waste in your trash bin
- Saves you money on plumbing services by minimizing the chances of clogs and blockages
- Protects the environment by diverting food waste from landfills
Tools and Materials
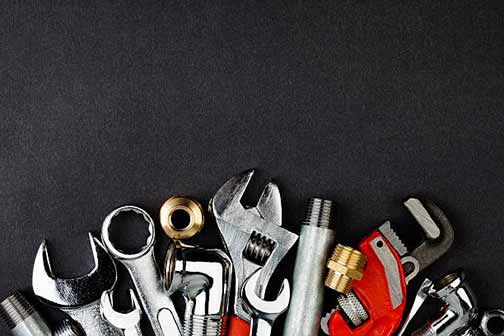
Before you begin the installation process, make sure you have the following tools and materials:
- Garbage disposal unit
- Plumber’s putty
- Plumber’s tape
- Screwdriver
- Adjustable wrench
- Pliers
- Hacksaw
- Electrical cord
- Wire connectors
- Hammer
- Bucket
- Old towels or rags

Step 1: Preparation
Before you get started with the installation, it is crucial to prepare your kitchen and gather all the necessary tools and materials. Follow these steps:
- Turn off the power: Locate the circuit breaker that controls the electrical supply to your kitchen and switch it off.
- Clear the area under the sink: Remove any cleaning supplies, buckets, or other items from underneath the sink to create a clear working space.
- Gather the tools and materials: Collect all the tools and materials mentioned above and place them within reach.
- Read the manufacturer’s instructions: Familiarize yourself with the specific instructions provided by the manufacturer of your garbage disposal unit.
Step 2: Remove the Old Disposal (If Applicable)
If you are replacing an existing garbage disposal unit, follow these steps to remove it:
- Disconnect the power: Ensure that the power supply to the existing disposal unit is disconnected from the electrical source.
- Disconnect the plumbing: Loosen the nut that connects the drain pipe to the disposal unit. Use pliers or an adjustable wrench to loosen and remove the nut.
- Remove the disposal unit: With the plumbing disconnected, carefully remove the existing disposal unit from the mounting assembly.
Step 3: Install the Mounting Assembly
The mounting assembly is the structure that will hold your new garbage disposal unit securely in place. To install it, follow these steps:
- Place the mounting assembly: Position the mounting assembly over the drain hole on the sink basin.
- Secure the mounting assembly: Attach the mounting assembly to the sink basin using the screws provided with your garbage disposal unit. Use a screwdriver to tighten the screws securely.
Step 4: Connect the Electrical Wiring
Properly connecting the electrical wiring is essential for the safe and effective functioning of your garbage disposal unit. Follow these steps:
- Prepare the electrical cord: If your garbage disposal unit does not come with an electrical cord pre-installed, you may need to attach one. Follow the manufacturer’s instructions to do this.
- Connect the wires: Use wire connectors to connect the wires from the electrical cord to the corresponding wires on the disposal unit. Follow the color-coding provided in the manufacturer’s instructions.
- Secure the connections: Once the wires are connected, use electrical tape or wire connectors to secure the connections and prevent any exposed wires.
Step 5: Attach the Disposal Unit
With the mounting assembly in place and the electrical wiring connected, it’s time to attach the garbage disposal unit. Follow these steps:
- Position the disposal unit: Lower the garbage disposal unit onto the mounting assembly, aligning the mounting tabs on the unit with the mounting ring on the assembly.
- Rotate and lock the disposal unit: Following the manufacturer’s instructions, rotate the disposal unit clockwise to lock it into place on the mounting assembly.
- Secure the disposal unit: Use a screwdriver to tighten the mounting screws, ensuring that the disposal unit is securely attached to the mounting assembly.
Step 6: Connect the Plumbing
Now that the garbage disposal unit is securely in place, it’s time to connect the plumbing. Follow these steps:
- Attach the discharge tube: Connect the discharge tube to the disposal unit’s outlet. Use a screwdriver or pliers to tighten the clamp securely.
- Connect the drain pipe: Attach the drain pipe to the other end of the discharge tube. Use plumber’s tape and a wrench to tighten the connection.
- Check for leaks: Once the plumbing connections are secure, turn on the water and check for any leaks. Tighten any connections if necessary.
Step 7: Test and Finalize
Before you consider the installation complete, it’s essential to test the garbage disposal unit and make some final adjustments. Follow these steps:
- Turn on the water: Run water into the sink and check for any leaks around the plumbing connections. If there are any leaks, tighten the connections until the leaks stop.
- Test the disposal: Turn on the power supply to your kitchen and switch on the garbage disposal unit. Carefully feed small amounts of food waste into the disposal and ensure that it grinds and drains correctly.
- Make necessary adjustments: If you notice any issues with the disposal unit’s performance, consult the troubleshooting section of the manufacturer’s instructions. Make any necessary adjustments or repairs.
Congratulations! You have successfully installed a garbage disposal unit in your home. By following our step-by-step instructions, you have mastered the art of garbage disposal installation. Enjoy the convenience and benefits that come with having a functional garbage disposal system in your kitchen!
Note: It’s essential to prioritize safety during the installation process. If you are unsure or uncomfortable with any step, it is always wise to contact a professional plumber for assistance.

