When it comes to toilet repair, it can be frustrating to deal with unexpected issues that can disrupt your daily routine. However, with the right knowledge and a step-by-step approach, you can tackle toilet repairs like a professional. In this article, we will provide you with a comprehensive guide on how to repair common toilet issues, allowing you to save both time and money. Whether you are a homeowner, a DIY enthusiast, or a professional plumber looking to enhance your knowledge, this guide is designed to cater to your needs.
The Importance of Proper Toilet Maintenance
Before we get into the step-by-step process of toilet repair, it is crucial to understand the importance of regular maintenance. A well-maintained toilet not only functions efficiently but also helps prevent costly repairs down the line.
Regular maintenance involves inspecting the toilet components, addressing minor issues promptly, and cleaning to prevent clogs and other problems. It is recommended to conduct a thorough inspection annually and perform basic maintenance tasks regularly to ensure optimal performance.
By following this step-by-step toilet repair guide, you will not only be able to fix common toilet issues but also gain a deeper understanding of how your toilet works, empowering you to handle future repairs with confidence.

Gathering the Necessary Tools
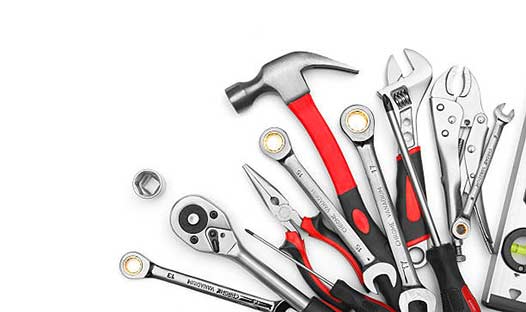
Before starting any toilet repair, it is crucial to gather the necessary tools and materials. Here’s a list of commonly used tools for most toilet repairs:
- Adjustable wrench
- Plunger
- Screwdriver (flathead and Phillips)
- Plumber’s tape
- Utility knife
- Pliers
- Toilet auger
- Bucket
- Old rags
Having these tools ready will save you time during the repair process and ensure you have everything you need to complete the job effectively.
Common Toilet Issues and How to Fix Them
1. Toilet Running Continuously
A running toilet is not only annoying but can also lead to a wastage of water and an increase in your water bill. Typically, a continuously running toilet is caused by a faulty flapper valve.
Step 1: Turn off the water supply to the toilet by locating the shut-off valve, usually positioned near the wall behind the toilet.
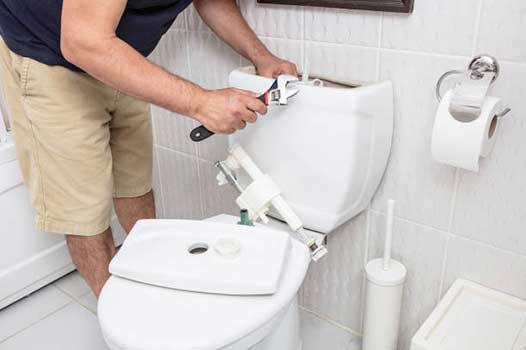
Step 2: Remove the tank lid and inspect the flapper valve. If the flapper is damaged or worn-out, it needs to be replaced.
Step 3: Drain the tank by flushing the toilet and holding down the handle until the water is completely emptied.
Step 4: Remove the old flapper by unhooking it from the chain and replace it with a new one of the same size and shape.
Step 5: Attach the new flapper to the chain and ensure there is enough slack for proper function.
Step 6: Turn on the water supply and let the tank fill up. Test the toilet by flushing and ensure it stops running after the tank is full and not flushing slowly.

2. Clogged Toilet
A clogged toilet can cause considerable inconvenience and frustration. By following these steps, you can resolve most minor clogs without the need for professional assistance.
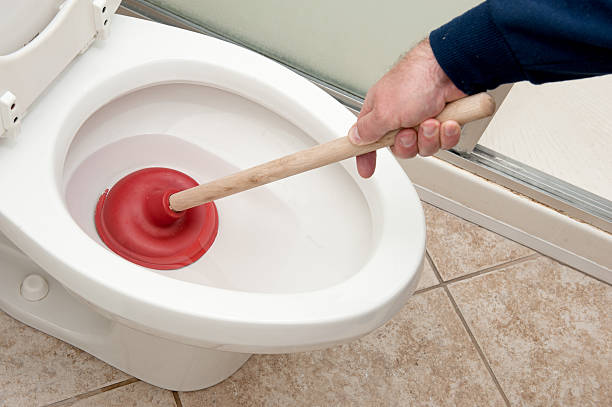
Step 1: Equip yourself with a good-quality plunger specifically designed for toilets. Place the plunger’s cup over the drain hole at the bottom of the toilet bowl, ensuring a tight seal.
Step 2: Push the plunger down gently at first and then vigorously, creating a suction force to dislodge the clog. Repeat this motion several times until the water starts draining or the clog is cleared.
Step 3: If plunging does not resolve the clog, try using a toilet auger. Insert the auger’s flexible end into the toilet drain and turn the crank handle clockwise to break up the obstacle.
Step 4: Once the clog is cleared, flush the toilet to ensure proper drainage. If the clog persists, it is advisable to seek professional assistance to prevent further damage.
3. Leaking Toilet
A leaking toilet not only wastes water but can also cause structural damage to your bathroom. It is essential to address a leak promptly to prevent further complications.
Step 1: Identify the source of the leak. Leaks can occur from various points, such as the base of the toilet, the water supply line, or the tank.
Step 2: If the leak is occurring from the base, it is likely that the wax ring seal between the toilet and the flange has deteriorated. To fix this, you will need to remove the toilet and replace the wax ring.
Step 3: If the leak is originating from the water supply line or the tank, inspect the connections for any loose or damaged parts. Tighten the connections or replace any faulty components accordingly. Applying plumber’s tape to threaded connections can also help prevent leaks in the future.
Step 4: Once the necessary repairs are made, turn on the water supply and check for leaks. Observe the toilet for a while to ensure the issue is completely resolved.

4. Weak Flushing
A weak flushing toilet can be frustrating and ineffective. To restore the flushing power, follow these steps:
Step 1: Check the water level in the tank. The water should be at least 1 inch below the top of the overflow tube. Adjust the float or the fill valve if necessary to achieve the appropriate water level.
Step 2: Inspect the rim holes under the toilet bowl’s edge. These holes play a vital role in generating a powerful flush. If they are clogged with mineral deposits, clean them using a wire hanger or a small brush.
Step 3: Examine the flapper valve and ensure it opens fully when the toilet is flushed. If the flapper is not opening properly, adjust the chain or replace the flapper if necessary.
Step 4: If the previous steps fail to resolve the weak flushing, the toilet’s venting system may be obstructed. Vent pipes on the roof allow air to enter the drainage system, assisting in proper flushing. Consult a professional plumber to diagnose and rectify any venting issues.
Conclusion
By following this step-by-step toilet repair guide, you can tackle common toilet issues effectively and efficiently. Remember to conduct regular maintenance to prevent future problems, and always prioritize safety throughout the repair process. While minor repairs can be done by homeowners or DIY enthusiasts, it is important to seek assistance from a local plumber for complex issues to avoid further damage or potential hazards. With the right tools, knowledge, and approach, you can handle toilet repairs like a professional and ensure optimal functioning of your toilet for years to come.

