
An outdoor faucet that drips, leaks at the base, or refuses to shut off completely isn’t just an annoyance — it’s wasting water and potentially causing damage to your siding, foundation, or the wall cavity behind it. Replacing it is one of those home maintenance tasks that looks more intimidating than it actually is. With the right tools, a basic understanding of your home’s plumbing, and a little patience, most homeowners can handle a straightforward outdoor faucet replacement without too much trouble.
That said, not every outdoor faucet replacement is straightforward. Older homes in particular can present surprises once you get into the wall — corroded pipe connections, outdated fittings, or shutoff valves that haven’t been touched in decades. This guide walks you through what the job involves, what to watch out for, and when it makes more sense to call a licensed plumber than to push through on your own.
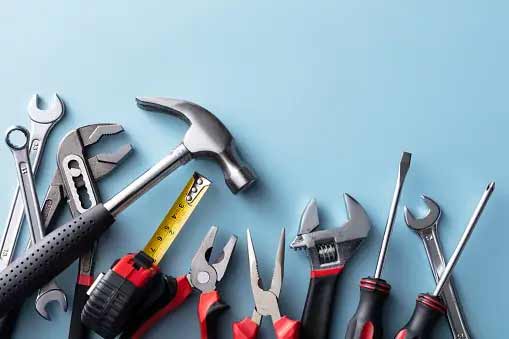
Gather the Necessary Tools and Materials
Before you begin, make sure you have all the tools and materials needed for the replacement process. Here’s a list of items you may require:
– Adjustable wrench
– Pipe wrench
– Screwdriver
– Teflon tape
– Replacement faucet
– Plumber’s tape
– Pipe cutter (if necessary)
– PVC glue (if necessary)
Turn Off the Water Supply
Prior to replacing the outdoor faucet, it’s crucial to turn off the water supply to prevent any accidents or water damage. Locate the main shut-off valve, usually located in your basement or crawl space. Close the valve by turning it clockwise until it is fully closed. Next, drain any remaining water from the system by opening a faucet at a lower elevation, such as a basement sink or an outdoor spigot.
Disconnect the Old Faucet
Start by removing any attachments, such as hoses or splitters, from the old faucet. To disconnect the faucet from the water supply line, use an adjustable wrench to loosen the hexagonal nut connecting the faucet to the pipe. Turn the nut counterclockwise until it is loose enough to remove by hand. If necessary, use a pipe wrench to hold the pipe steady while removing the nut.
Once the nut is removed, gently twist and pull the old faucet away from the pipe. Be cautious as there may still be some water remaining in the pipe that could leak out.
Prepare the Pipe for Installation
Inspect the end of the pipe for any sharp or uneven edges. If necessary, use a file or sandpaper to smooth out the surface. Apply a thin layer of plumber’s tape around the threaded end of the pipe to ensure a watertight seal. This step is particularly important for older pipes that may have corrosion or small cracks.
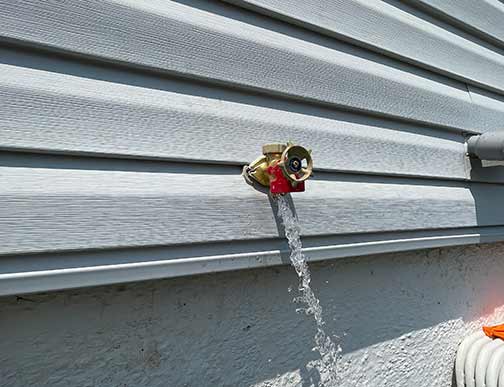
Install the New Faucet
Take the new faucet and align it with the threaded end of the pipe. Slowly twist the faucet clockwise onto the pipe, making sure it is securely tightened. Use an adjustable wrench to give it an extra quarter turn to ensure a snug fit, be careful not to overtighten as it may damage the faucet or pipe.
Test for Leaks
Now that the new faucet is installed, it’s time to test for any leaks. Turn on the water supply by reopening the main shut-off valve. Check for any signs of water leakage around the base of the faucet or where the pipe connects. If you notice any leaks, try tightening the faucet slightly, or if necessary, apply pipe joint compound or plumber’s tape for a better seal.
Reattach Hoses and Splitters
If you had disconnected any hoses or splitters before the replacement, securely reconnect them to the new faucet. Ensure they are tightly fastened for a leak-free connection. Consider using Teflon tape on the hose threads for added sealing.
Insulate the Faucet
To protect the outdoor faucet from freezing temperatures during winter months, it’s wise to insulate it. You can purchase foam faucet covers from a local hardware store or use an old towel or foam pipe insulation to wrap around the faucet. This insulation will help prevent frozen pipes and potential damage such as a burst pipe emergency.
To Wrap It Up
Replacing an outdoor faucet is a manageable project when the conditions are right — the right tools, a cooperative shutoff valve, and pipes that aren’t hiding any surprises behind the wall. Follow the steps outlined above, take your time, and test thoroughly before you call the job done. A properly installed, leak-free outdoor faucet is a small thing that makes a real difference in how your home’s plumbing performs day to day.
If you hit a snag at any point — a corroded connection that won’t budge, a shutoff valve that’s given up, or pipes that clearly need more attention than a simple swap — don’t force it. That’s the point where a licensed plumber saves you time, money, and the risk of turning a straightforward replacement into a much bigger repair. Give Suburban Plumbing Experts a call at 708-801-6530 and we’ll take it from there.