Frozen pipes are a common issue in colder climates, and they can cause significant damage if not addressed promptly. When water freezes, it expands, which can lead to pipes bursting and causing leaks. Understanding the importance of thawing frozen pipes can help prevent costly repairs and water damage to your property.
Frozen pipes can disrupt your daily activities, pose health risks due to potential water contamination, and lead to extensive property damage if left untreated. Therefore, knowing how to handle frozen pipes and prevent them from freezing in the first place is crucial for every homeowner.
Identifying Frozen Pipes in Your Home
Before you can thaw frozen pipes, you need to identify which pipes are affected. Common signs of frozen pipes include:
- No water or reduced water flow from faucets.
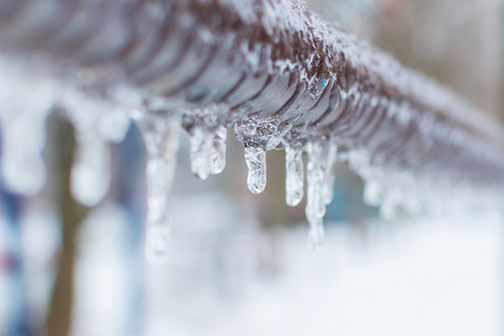
- Frost or ice on the exterior of the pipes.
- Strange noises, such as banging or clanking, coming from the pipes.
- Unusual odors coming from the drains, which can indicate a blockage caused by ice.
Identifying frozen pipes early can prevent further damage and allow you to take immediate action. Pipes most susceptible to freezing are those located in unheated areas such as basements, attics, garages, and exterior walls. Knowing the layout of your home’s plumbing system can help you quickly locate and address frozen pipes.
Steps to Thaw Frozen Pipes Safely
Thawing frozen pipes requires careful attention to avoid causing further damage. Here are the steps to thaw frozen pipes safely:
Step 1: Turn Off the Water Supply
The first step in thawing frozen pipes is to turn off the water supply to prevent any potential leaks once the ice starts to melt. Locate the main water shut-off valve in your home and turn it off. This step is crucial to avoid water damage if the pipe bursts during the thawing process.
Step 2: Open Faucets
Open all faucets connected to the frozen pipes. This will allow the water to flow once the ice starts to melt and relieve any pressure buildup in the pipes. Opening the faucets also helps to identify when the ice has melted, as water will start to flow through the pipes again.
Step 3: Apply Heat to the Frozen Pipes
Use a heat source to gradually warm the frozen pipes. Some safe methods include:
- Using a hairdryer: Start from the faucet end and work your way towards the frozen section. Avoid using high heat settings to prevent damaging the pipes.
- Wrapping the pipes with warm towels: Soak towels in hot water and wrap them around the pipes. Replace the towels with freshly soaked ones as they cool down.
- Using a space heater: Place a space heater near the frozen pipes, ensuring it is not too close to avoid overheating. Keep the heater at a safe distance and monitor it continuously.
Avoid using open flames or high heat sources, such as blowtorches, as they can damage the pipes and pose a fire hazard. Gradual and controlled heating is essential to safely thaw frozen pipes.
Step 4: Monitor the Thawing Process
Keep a close eye on the thawing process to ensure there are no leaks or a burst plumbing pipe emergency. If you notice any issues, turn off the heat source and call a professional plumber immediately. Monitoring the process allows you to detect any problems early and take appropriate action to prevent further damage.

Detecting Leaks After Thawing
Once the pipes have thawed, it is crucial to check for any leaks that may have occurred. Follow these steps to detect leaks:
Step 1: Inspect the Pipes
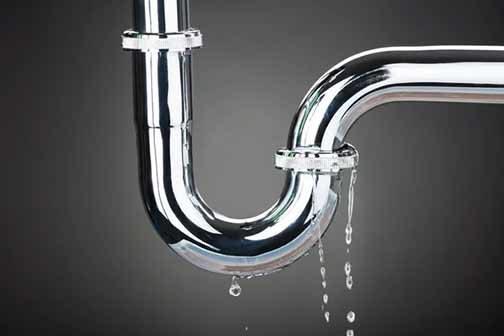
Carefully inspect the thawed pipes for any visible signs of damage or leaks. Look for cracks, holes, or water droplets on the pipes. Pay special attention to joints and connections, as these areas are more prone to leaks.
Step 2: Check the Water Meter
Turn on the main water supply and check the water meter. If the meter continues to run even when no water is being used, it may indicate a leak. Monitoring the water meter can help you detect hidden leaks that are not immediately visible.
Step 3: Listen for Unusual Sounds
Listen for any unusual sounds, such as hissing or dripping, which can indicate a leak in the pipes. These sounds may be more noticeable in quiet areas of your home. Using a stethoscope or a similar listening device can help you pinpoint the source of the leak.
Repairing Damages Associated with Thawing Frozen Pipes
If you detect any leaks or damage after thawing frozen pipes, it is essential to repair them promptly to prevent further issues. Here are the steps to repair damaged pipes:
Step 1: Turn Off the Water Supply Again
Before making any repairs, turn off the water supply to prevent further water damage. This step ensures that you can work on the pipes without the risk of water flowing through them.
Step 2: Drain the Pipes
Open all faucets and drain the water from the damaged pipes. This will make it easier to repair the pipes. Draining the pipes also helps to remove any residual ice or water that could interfere with the repair process.
Step 3: Cut Out the Damaged Section
Use a pipe cutter or hacksaw to remove the damaged section of the pipe. Make sure to cut at least an inch beyond the damaged area to ensure a clean repair. Cutting beyond the damaged area helps to remove any weakened sections of the pipe that could cause future leaks.
Step 4: Replace the Damaged Section
Replace the damaged section with a new piece of pipe. Use couplings to connect the new section to the existing pipes. Ensure the connections are secure and watertight. Using the appropriate type of pipe and fittings for your plumbing system is essential for a successful repair.
Step 5: Test the Repair
Turn on the water supply and check for any leaks. If the repair is successful, there should be no water escaping from the repaired section. Testing the repair thoroughly ensures that the issue has been resolved and prevents future problems.

Preventing Frozen Pipes in the Future
Preventing frozen pipes is essential to avoid the hassle and expense of thawing and repairing them. Here are some tips to prevent pipes from freezing in the future:
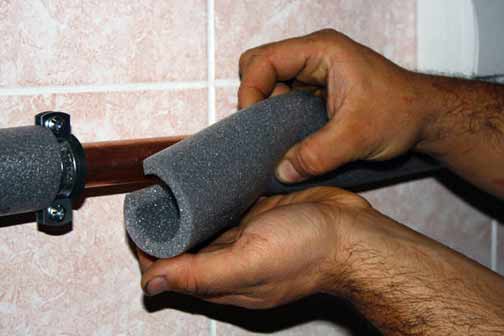
- Insulate Pipes: Use pipe insulation to protect pipes in unheated areas, such as basements, attics, and crawl spaces. Insulating pipes helps to maintain a consistent temperature and prevents freezing.
- Seal Gaps: Seal any gaps or cracks in the walls, floors, and foundation to prevent cold air from reaching the pipes. Using caulk or weatherstripping can help to seal gaps effectively.
- Keep a Consistent Temperature: Maintain a consistent temperature in your home, even when you are away. Set the thermostat to at least 55°F (13°C). Keeping the temperature consistent prevents pipes from being exposed to extreme cold.
- Let Faucets Drip: During extremely cold weather, let faucets connected to vulnerable pipes drip slightly. This can prevent the water in the pipes from freezing. Allowing a small amount of water to flow through the pipes reduces the risk of freezing.
- Open Cabinet Doors: Open cabinet doors under sinks to allow warm air to circulate around the pipes. This is especially important for pipes located on exterior walls. Allowing warm air to reach the pipes helps to keep them from freezing.
Taking preventive measures can save you time, money, and stress by reducing the risk of frozen pipes.
When to Call a Professional Plumber
While many frozen pipe issues can be handled by homeowners, there are times when it is best to call a professional plumber. Consider calling a plumber if:
- You are unable to locate the frozen section of the pipe.
- The pipe is in a hard-to-reach area.
- You notice significant damage or multiple leaks.
- You are uncomfortable performing the repairs yourself.
Plumbers have the expertise, tools, and experience to handle complex frozen pipe issues and to professionally thaw out frozen pipes. They can quickly diagnose the problem, provide effective solutions, and ensure that your plumbing system is restored to proper working order.
To Sum It Up
Handling thawing frozen pipes requires careful attention and prompt action to prevent further damage. By following the steps outlined in this guide, you can safely thaw frozen pipes, detect leaks, and repair any damages. Additionally, taking preventive measures can help avoid frozen pipes in the future.
If you encounter any issues beyond your expertise, do not hesitate to call a local plumber for assistance. Ensuring the integrity of your plumbing system is essential for maintaining a safe and comfortable home environment.

